
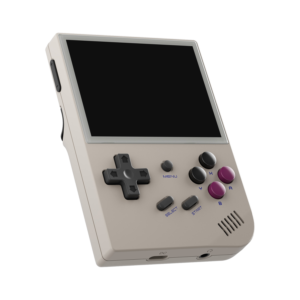
I recently got myself an Anbernic RG35XX, a nifty pocket-sized device capable of summoning the nostalgia of up to 5th generation game consoles like the original PlayStation. Quite a feat for such a compact gadget, right?
The first thing I did was installing GarlicOS immediately after unpacking the console. It not only offers much better experience compared to original firmware, but it also unlocks a myriad of bonus features - all thanks to the magic of RetroArch.
How to install GarlicOS is out of scope of this post. There is lots of articles and videos that explain it step by step already. You should have no issues finding them.
Throughout this project, I’m using packages listed below. If you are following me along, make sure to install them first:
imagemagick pv pigz
Tip
If you want to recycle game roms that came on the SD card with your Anbernic device, you’ll notice they’re tucked away in various subfolders. Not ideal, as GarlicOS expects to see loose files, with the only folders being the system ones (GB, GBA, GBC, etc.).
You can recursively find all files within subfolders and move them to your current working folder with:
find ./ -type f -print0 | xargs -0 mv -t ./
After doing that, you can remove all subfolders, which should now be empty.
Getting box art images (on the) right
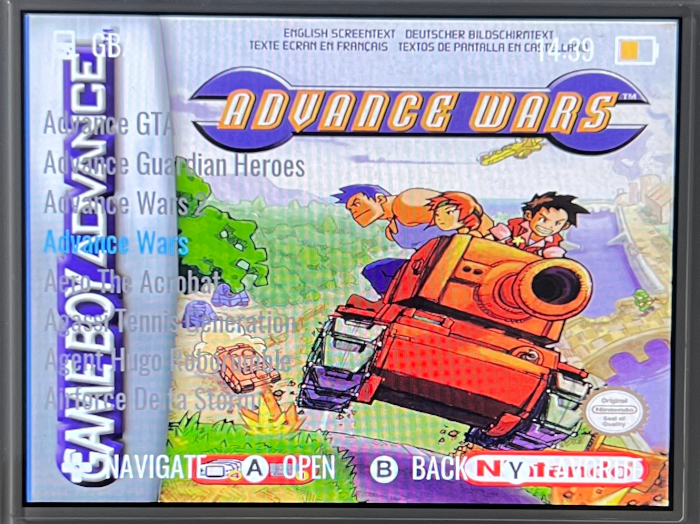
At the time of writing this, current release of GarlicOS is 1.4.9. The way it handles box art images might change in the future, but right now it stretches them to occupy the full 640x480 resolution screen, leaving your interface looking something like this::
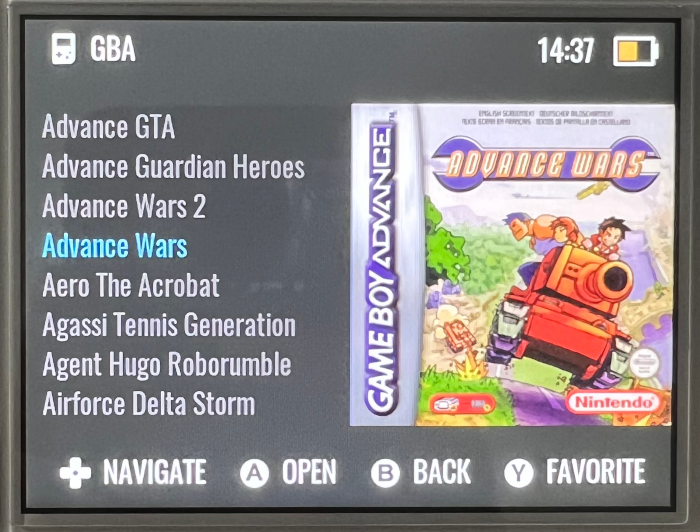
So to fix this, we will convert all the images and realign text, so the end result will look like this:
I won’t be covering how to get those box art images. There are multiple ways to acquire them, like using Skraper, or manually downloading them from this archive on Github, which is handy if you are looking for a specific image.
Tip
Just a quick shoutout to Garlic-Os-Skraper, a user-created mix that can be imported into Skraper to automatically convert images for GarlicOS. It’s definitely easier than my approach and the end result looks great. However, at the time of writing this, I wasn’t aware of this neat trick, so let’s press on…
You want to get to the point of:
- Having a clean and working setup of GarlicOS on your SD card
- All the game roms loaded and working
- All the box arts scrapped, but not yet transferred to the SD card. Your image file names should match your game roms.
To continue from there, use mogrify to convert box art images. It comes as part of imagemagick package. Navigate to the directory with all the box art images (and only images, no other files) and run:
mogrify -verbose -resize '320x320>' * ; mogrify -verbose -extent 640x480 -gravity East -background none *
The command above reshapes all your images to fit within 320x320 pixel square before stretching the canvas size to fill the RG35XX’s 640x480 screen while retaining the image’s original size and proportions. If you fancy your images aligned to the left and the text to the right (I’m doing the opposite), just swap -gravity East to -gravity West
Next, put the images inside Imgs folder for each system on ROMS partition, e.g. ROMS/Roms/GBA/Imgs/ for Game Boy Advance.
On to the next thing: aligning text. By default, the text likes to hog the center of the screen. If you prefer it taking a left turn, you’ll need to tinker with the theme config for GarlicOS, located at ROMS/CFW/skin/settings.json. Look for these two lines and set them to:
"text-alignment": "left",
"text-margin": 16,
If you chose to align box art images to the left and now want to align text to the right, the changes would be:
"text-alignment": "right",
"text-margin": 340,
Taking a backup of your SD card
SD cards, while handy, aren’t the most hardy, and are known to surrender to write cycles over time. Now is the best time to clone your working setup.
Identify the target device with lsblk. In my case, it’s /dev/sdf, so I’ll set it as a variable:
sdcard="/dev/sdf"
Now brace yourself for this one line behemoth that’ll backup your SD card:
sudo dd if=$sdcard | pv -s `lsblk -no SIZE $sdcard | head -n 1 | grep -o '[0-9]*'`G | dd of=anbernic_sd_backup_"`date +"%d-%m-%Y"`".img
Before you go ahead, make sure pv is installed. Here’s a quick breakdown: we’re reading the SD card with dd, passing that to pv for a detailed progress status, and then sending is back to dd to write the data to a file. We’re also checking the disk size with lsblk so that pv can provide an accurate progress bar and estimated completion time. Not the most refined way, perhaps, but it gets the job done! 😄
You can also compress the backup image using pigz at the same time, which provides gzip compression, but unlike gzip it isn’t limited to a single thread and thus it’s faster:
sudo dd if=$sdcard | pv -s `lsblk -no SIZE $sdcard | head -n 1 | grep -o '[0-9]*'`G | pigz > anbernic_sd_backup_"`date +"%d-%m-%Y"`".img.gz
Resulting file in my case was significantly smaller, largely due to the compression of the empty disk space:
| File type | Size | % |
|---|---|---|
| RAW disk image | 58G | 100% |
| Compressed disk image | 39G | 67.2% |
You can later restore RAW disk image like so:
Warning
This will wipe out all existing data on your target device. So double-check the sdcard variable! echo $sdcard.
cat DISK_IMAGE_FILE.img | pv | sudo dd of=$sdcard bs=5M
If you’ve compressed it, pipe it to gzip for decompression. Unfortunately gzip decompression is always limited to single thread, so pigz isn’t going to be much faster here:
cat DISK_IMAGE_FILE.img.gz | gzip -dk | pv | sudo dd of=$sdcard bs=5M
That’s it, folks! Game on!